I love seasonal autumn and Halloween decorations, but with so many holidays in the last few months of the year, it can get expensive to buy decorations for one more holiday. So over the years, we've turned to crafting our own at-home Halloween and fall decorations. It is both less expensive than storebought, and provides great family time since the kids want to help out.
Through our years of creating fall decorations for our home, I have discovered that there are many great craft items right in our recycle bin!
Here are five of our favorite inexpensive upcycled crafts perfect for October:
Halloween luminaries | Fall leaf vase | Painting nature | Periodical pumpkins and apples | Canned pumpkins and ghosts
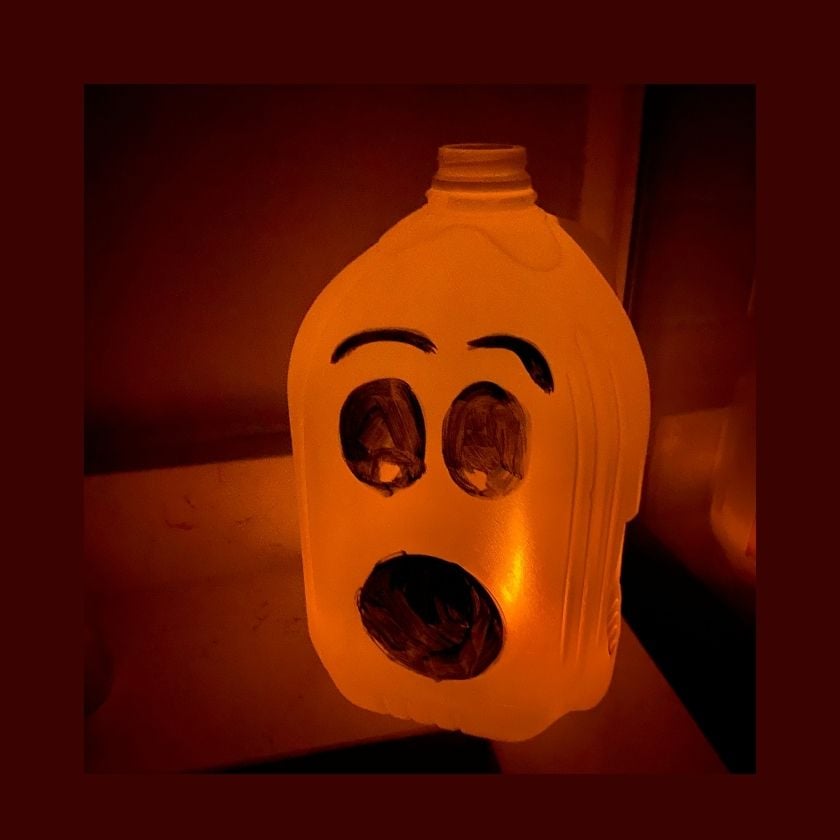 |
Halloween luminaries
This craft is very simple and there is a chance you have everything you need already! These are also a great way to help trick-or-treaters see their way from door to door at night.
What you need:
- An empty and cleaned plastic milk container (Ours are gallon size, but this can definitely work with the half gallon sizes too!)
- Scissors or a knife
- Black sharpie or black acrylic paint
- Battery-powered votive or glow stick
Directions:
- A grown-up should use scissors or a knife to cut an opening in the side of the jug. (I usually just cut the area with the label. They are incredibly sticky and there is no need in wasting time trying to remove it.) This will be your access point to light up your creation.
- Use a black Sharpie or black acrylic or tempera paint to create a face. My kids like to make ghost faces, but your only limitation is your imagination on this one! Ghosts, pumpkins, witches, zombies, cats, and bats are all great ideas.
- Use a battery-powered votive or glow stick to light up your luminaries once it gets dark.
Tip: If you want an orange pumpkin, green witch, etc - then a glow stick is an easy way to make that happen. If you want to light your luminaries up on multiple evenings with a votive, then you can paint the inside of your milk jug. To do this, after washing it out, add a little paint and water, replace the lid and gently shake the container. Shake and move the jug around to spread the paint, then remove the lid and set the jug upside down on a plate or paper towels to dry and drain.
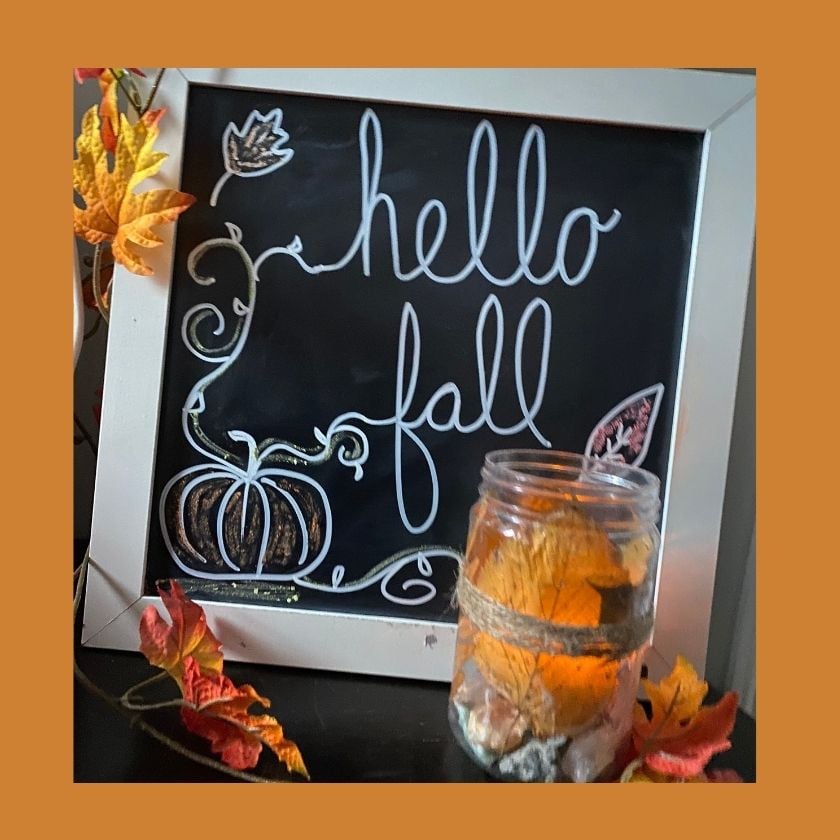 |
Fall leaf vase
Our daughter is a collector. In fact, we call her The Squirrel because she has a special little drawer and box where we discover all sorts of stashed "treasures" of hers. She likes to collect leaves, rocks, pinecones, and once I found no fewer than 50 acorns in her treasure drawer, which is what confirmed that The Squirrel was a fitting nickname. I try to encourage her to use her nature collection for art as often as possible. This was a fun project that is actually evolving as the season progresses!
What you need:
- A bag or bucket
- Empty and cleaned jar or can
- Mod Podge (or white glue) and a paintbrush
Directions:
- Get your shoes on and go for a walk! Bring along a bag or bucket for your own collection of leaves, rocks, pinecones, etc. You can even print off this fun Scavenger Hunt to bring along (but please, don't bring home any squirrels or rabbits!)
- Back at home, find an empty and cleaned jar or can to use to create your vase. We found an empty peanut butter jar that was heading to our recycle bin for our project.
- Take all of the leaves and foliage you collected from your walk and spread them out. You will also want some Mod Podge and a paintbrush. (If you don't have Mod Podge you can create your own with white glue by adding a little water to thin it out.)
- Glue your leaves to the side of your container. I painted the inside of my jar with the glue mixture and then little hands helped me press the leaves into place. But if you are using an opaque can or jar, you can definitely attach them to the exterior! It may look like a white glue disaster for a while, but with time you will see it will dry clear.
Tip: We currently use our jar to contain "treasures" found on our walks and a small battery-powered votive to light it up, but in November it will transition into something special for our Thanksgiving table! What will you use your creation for this season?
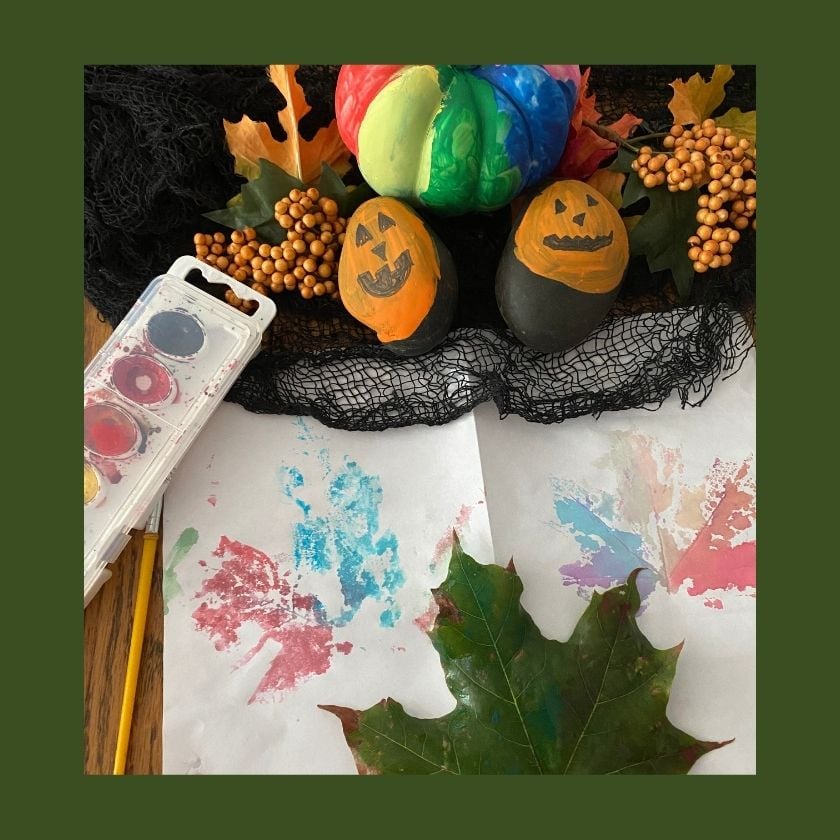 |
Painting nature
This one is pretty self-explanatory! Dip into that bucket you filled while on your scavenger hunt and pull out rocks, acorns, and pinecones and knock off any dirt and grime. Usually, a damp cloth will do the job just fine. Next, use acrylic paints to decorate them with whatever comes to mind. We have been making jack-o-lantern rocks and hiding them around our neighborhood for other kids to find. You could get really creative and see what you can create when you combine elements — maybe pieces for your own fairy garden? Or a pinecone person? What creative objects can your children come up with?
Tips: Another fun thing to do is to use the found objects as stamps or paintbrushes to create some great textured art!
You can also use a shoebox to create a shadow box to display your collection (Warning: This project always involves A LOT of glue, which my kids love.)
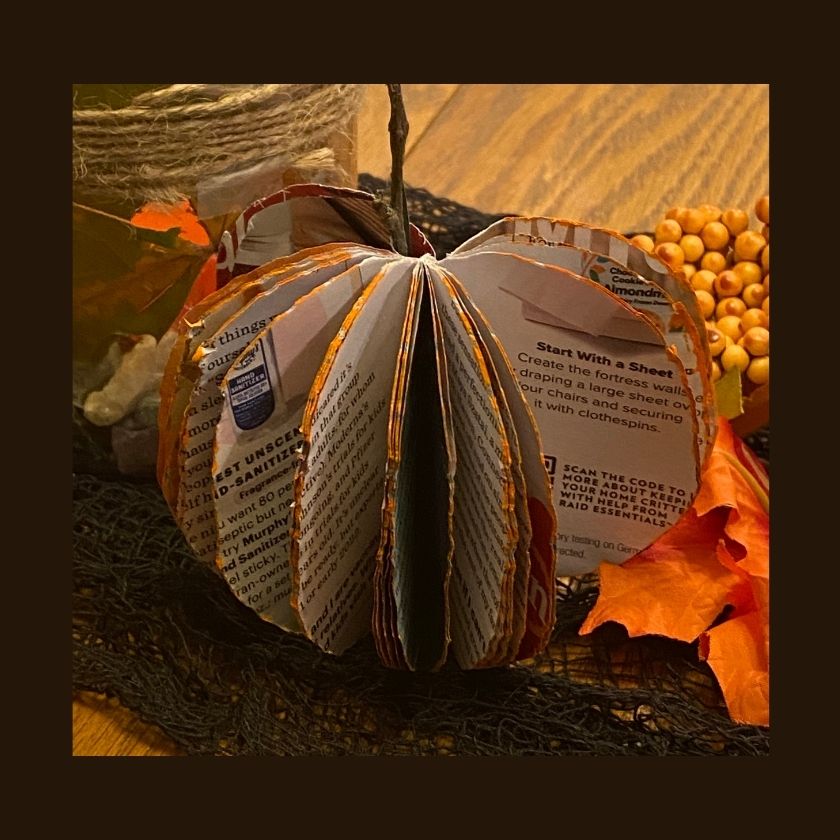 |
Periodical pumpkins and apples
Do you have a stack of magazines hanging around? I LOVE magazines — but I hate throwing them away for some reason. On the flip side, I also don't like stacks of magazines piling up. This is a fun way to create a unique piece for your autumn decorating, all while giving a new purpose to an old magazine.
What you need:
- An old magazine
- Pen or marker
- Scissors
- Twig, pipe cleaner, or construction paper
Directions:
- To create a pumpkin or apple, begin by making a template to the desired size, but keep in mind the size of your magazine.
- Fold template in half, matching the fold of the template to the spine of the magazine. Use a pen or marker to trace the design.
- Using scissors cut out your design and use a twig, pipe cleaner, construction paper or even a tightly rolled scrap of magazine, to create a stem. Place it along the spine and glue the front and back covers together to hold it in place.
- Take care to fold the individual pages back to fan them out evenly.
- You can leave as is, or you can add paint to the edges to give your pumpkin a hint of orange, or apple a splash of red and green.
- Depending on the size of your pumpkins and apples, you can often get more than one from a magazine.
Tip: We love practicing our scissor skills with magazines and catalogs. Save your scraps to cut out pieces to make a collage later.
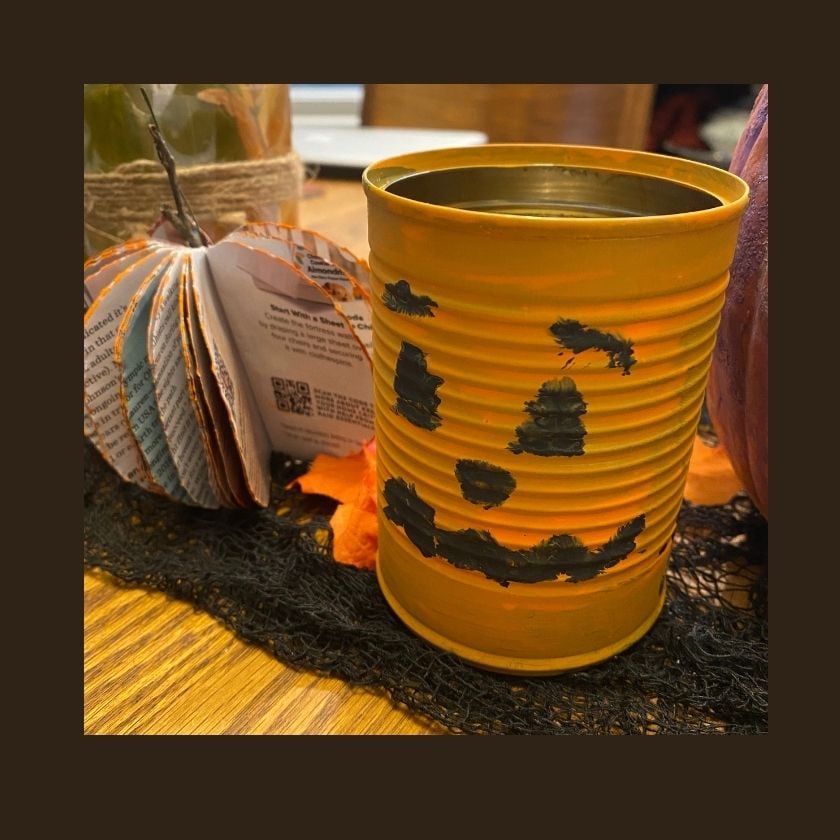 |
Canned pumpkins and ghosts
You can use paint, construction paper, magazines, and really anything you can get your hands on to create this project. So far this fall, we have kept it pretty simple with jack-o-lanterns, but as we get more empty cans, we will certainly add to our collection!
What you need:
- A clean empty can
- Acrylic or tempera paint
- A Sharpie
Directions:
- Paint the outside of your can in a color of your choice.
- Once dry, draw a Halloween-themed face! Will you make a pumpkin? A mummy? Frankenstein? The options are endless with these types of open-ended projects. (Don't have paint? You can wrap your can in construction paper or an old magazine page instead!)
Tips: The finished products make for great containers for anything from utensils to candy you don't want your sibling to mistake for their own.
If you make a set of 6 or 10, then you can turn them into some fun carnival-style games! One of our favorites is to stack them up and try to knock them down with a rolled-up sock or bean bag. Another fun one is to set them up like bowling pins and try to toss candy corns or small rocks into them from a few feet away. We love trying to see who can do it from the greatest distance!
Sara Yaniga is the publisher of Macaroni KID Chicago Midtown.